8.7%To entry--Typical win48.9%Won
ABRLong
$897M capVol 72nd percentileRSI 34Real Estate
A descending triangle combines repeated lows near one price with falling highs. Learn what those boundaries show, how a downside trade is defined and what its historical record measures.
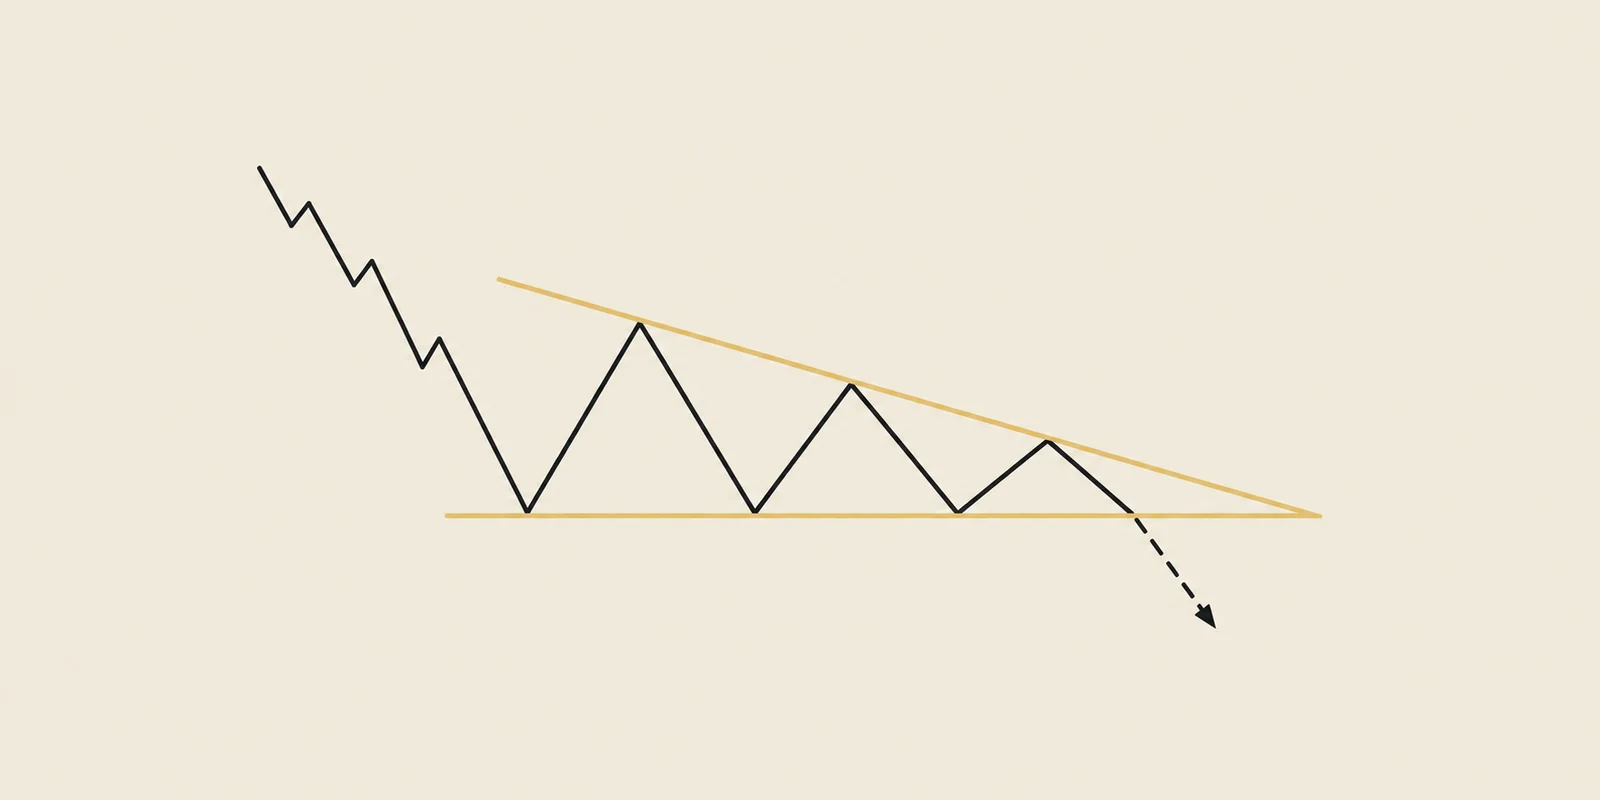
A descending triangle forms when declines stop near the same price while the rallies between them peak lower. Imagine lows near $40 and successive highs near $46, $44 and $42. These illustrative prices form a horizontal lower boundary and a falling upper boundary.
The lower area is called support because earlier declines stopped there. Each later rally covers less distance before turning down. See support and resistance for how these areas are identified.
The narrowing range can form during a decline or after a rally. Its boundaries describe the current consolidation; the trade begins when price reaches a defined trigger.
Use these features to check the shape:
Use one convention for deciding whether nearby lows belong to the same support area. A low at $40.10 and another at $39.70 require judgment; moving the line after seeing the next move changes the test.
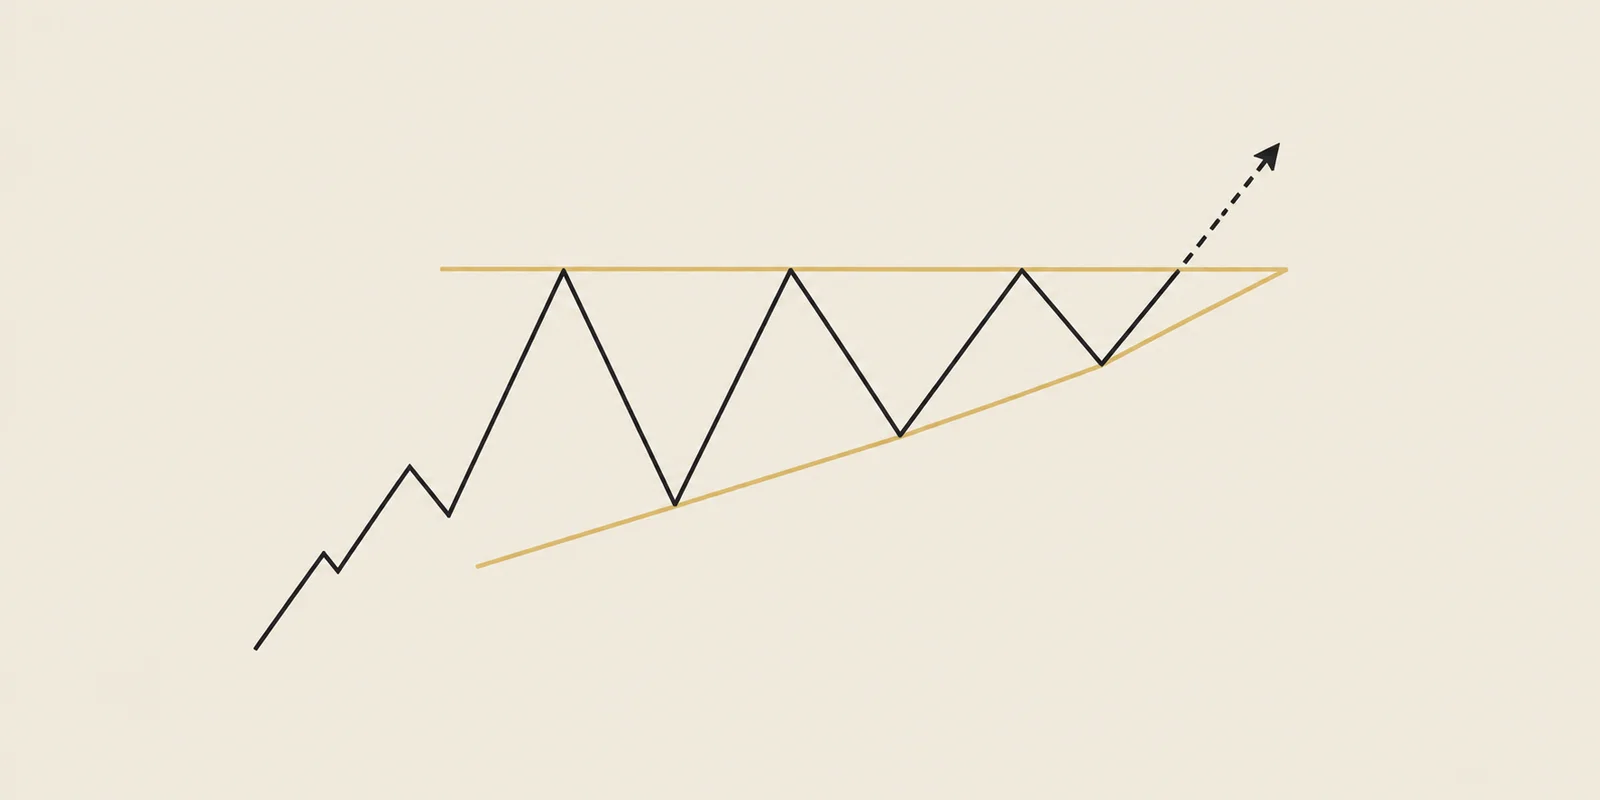
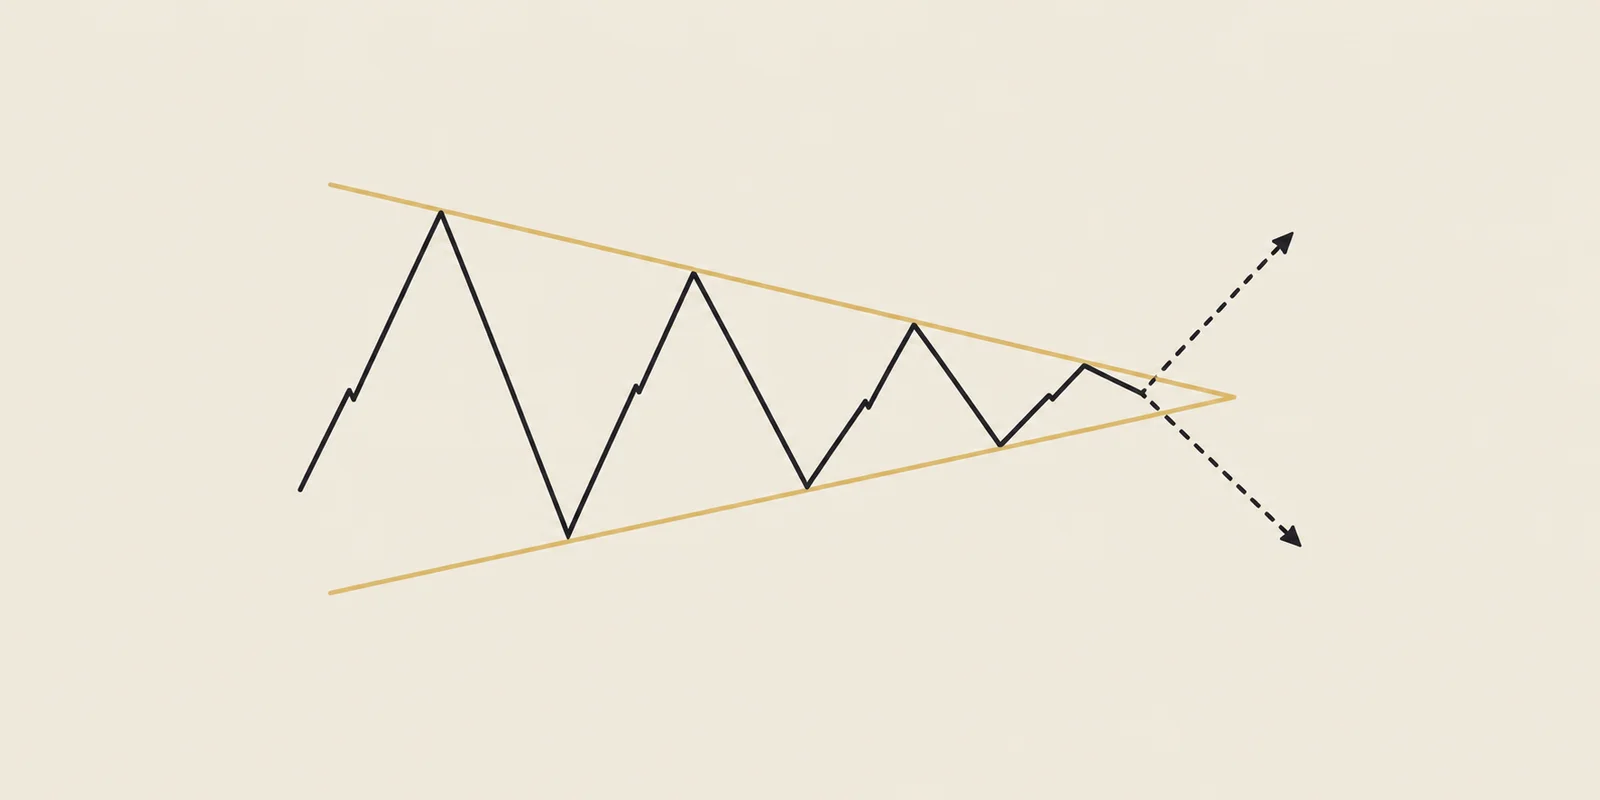
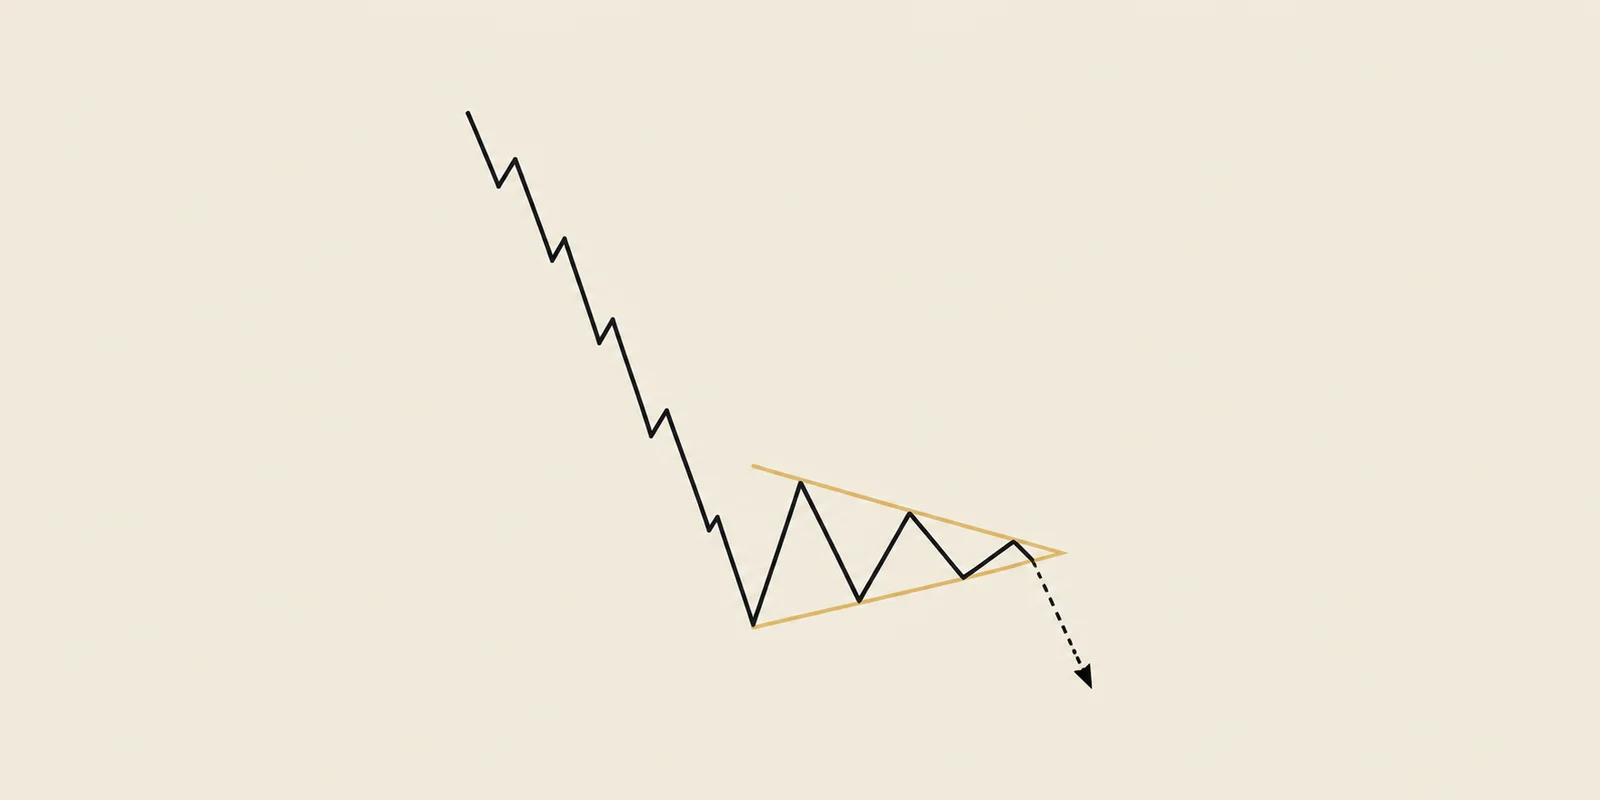
Compare the boundaries and the move preceding the consolidation to distinguish these related patterns.
Illustrative shapes. Compare the move before the pause and the direction of the two boundaries.
Traders watch for a downward break because each rally stops closer to the same support area. The stock can also recover through the falling upper boundary.
For the illustrative $40 support area, a downward trigger defines the bearish entry. The historical results separate that trade from an upward breakout, which uses different exit rules.
A short trade sells borrowed shares and later buys them back. It gains from a decline and loses from a rise; borrow availability and costs also affect whether a real trade is possible.
The following steps describe TradingPal’s historical simulation. Choose each step on the diagram to see where the price level sits. The risk/reward guide explains how the distance from entry to the safety exit becomes the planned risk, or 1R.
The simulation places its entry trigger below the flat lower boundary. The pattern must have been established on an earlier daily candle. The first eligible candle to reach the trigger can fill the order. If price gaps past it overnight, the simulation uses the worse opening price.
The planned invalidation level sits above the last bounce before the breakdown. The test closes the trade at the close of a later daily candle beyond that level. Price can overshoot it or gap past it, so the actual loss can exceed the planned 1R.
Measure the pattern’s height at its widest point and project that distance from the entry trigger in the direction of the trade. This is the measured-move target. The bearish rule closes at the projected downside target.
The table summarizes simulated trades using the entry and exit rules above. Check the direction, sample size and measurement period before comparing rows. These results update when a new historical run is published.
Read win rate together with the size of the wins and losses. A strategy can win half its trades and still gain or lose overall. Average R and profit factor help explain which happened; the track-record metrics guide covers the calculation.
The published pattern group includes shapes that passed later confirmation checks. That can affect which historical trades enter the sample, even when the simulated fill uses prices available at the time. The backtesting methodology explains this limitation and the portfolio assumptions.
Historical results of the simulated strategy described above (2006-09-08 – 2026-09-09), refreshed nightly — not a prediction. How we test →
The examples below are selected completed trades from the historical simulation. Compare the entry and exit in each, including the losing trades. Opening a symbol takes you to its current chart.
Selected for learning, with a mix of wins and losses where available. Closed in the 90 days ending Sep 11, 2026. This selection is not a win-rate sample.
Our screener re-draws these lines on 2,600+ symbols every night. The current matches appear below.
6 fresh descending triangles formed in the last 45 days across our growing universe of 2,600+ scanned symbols. Scan updated Sep 11, 2026.
6 structures found. See example
The day's #1 ranked setup, in your inbox.
Every morning we hand you the highest-ranked breakout structure found in our scan across 2,600+ tickers — Free.
See the full offeringIt is commonly watched for a downward break because the rallies are getting smaller. Both directions remain possible, and TradingPal reports them separately.
It describes a consolidation during the decline. A downward break would continue that move under the stated entry rule.
It shows repeated support tests and falling highs after a rally. A subsequent break determines whether the bullish or bearish rule becomes eligible.
Project the triangle’s widest height downward from the entry trigger. The tested bearish trade exits at that target unless its safety-exit rule ends it first.
The bullish rule uses an upward trigger and, after reaching its target, a 10-day moving-average exit. A trader already short follows the short position’s safety-exit rule.
An ascending triangle combines repeated highs near one price with rising lows.
The swings get smaller, but the next move can go either way.
A bearish pennant is a narrowing pause after a sharp decline.
Educational content, not investment advice. Backtest statistics are historical results of a simulated strategy, refreshed nightly — they describe the past, not the next trade.