
Bullish pennant
A bullish pennant forms when a sharp rally pauses in a small, narrowing range.
Read the guide →
A bearish pennant is a narrowing pause after a sharp decline. Learn to identify it, understand a short trade through its lower boundary, and assess the historical results.
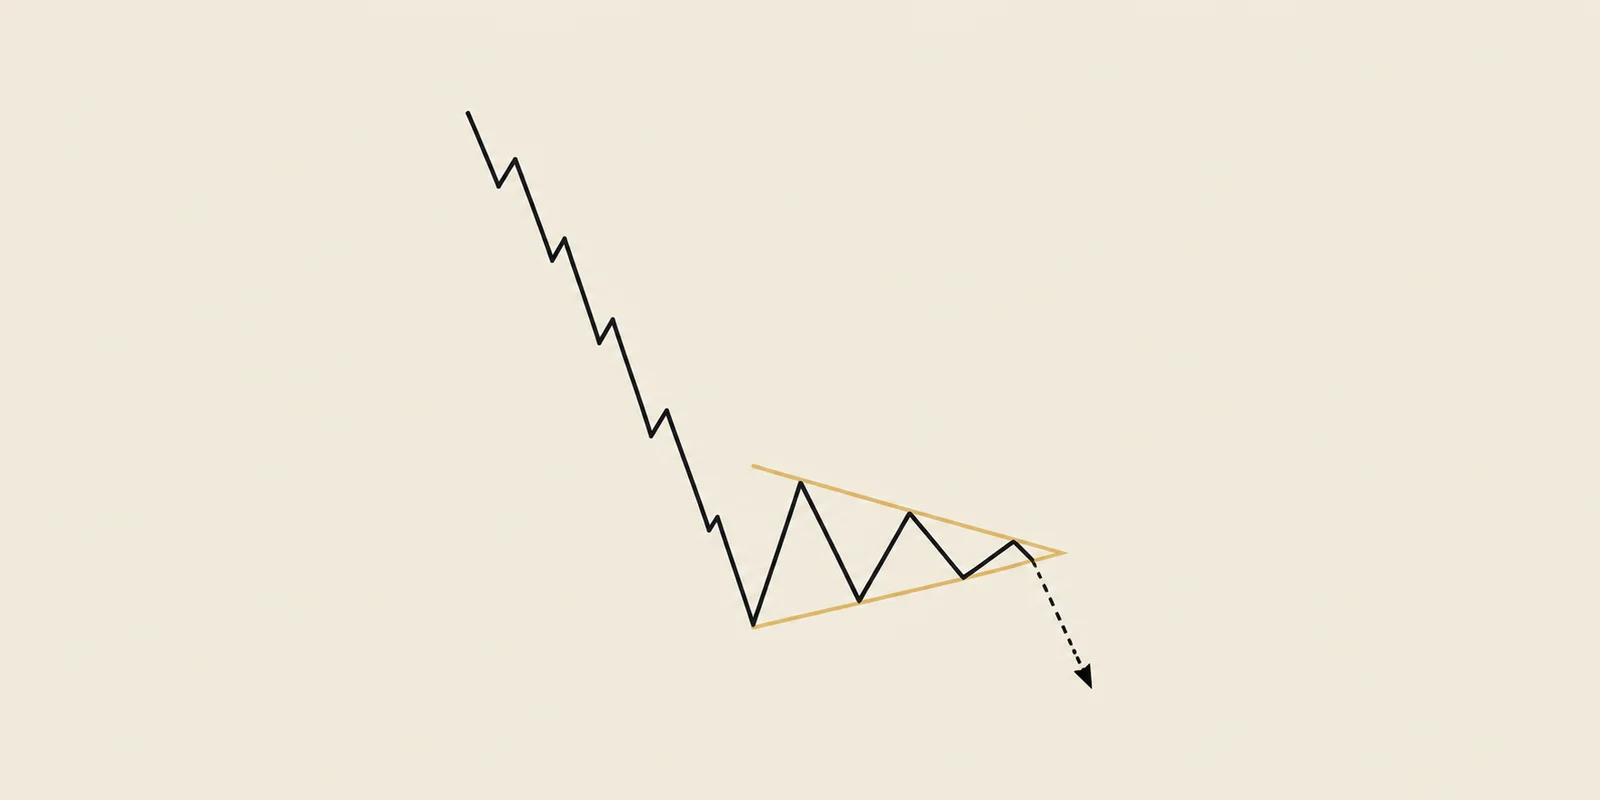
A bearish pennant forms when a sharp decline pauses in a small triangle. Imagine a stock falling from $50 to $40, then moving between $40 and $42 in smaller swings. The decline is the “pole” and the pause is the pennant. These prices are illustrative.
The pause gives traders a defined area to watch for another decline. Price may also recover above the upper boundary, so a bearish trade needs both a downward entry trigger and an exit for a reversal.
Compare the size of the pause with the earlier fall. A large recovery changes the shape and the trade being considered.
Use these features to check the shape:
Use the same timeframe to judge the decline and the pause. Volume can help describe trading activity, but the tested entry below uses a price trigger.
Compare the boundaries and the move preceding the consolidation to distinguish these related patterns.
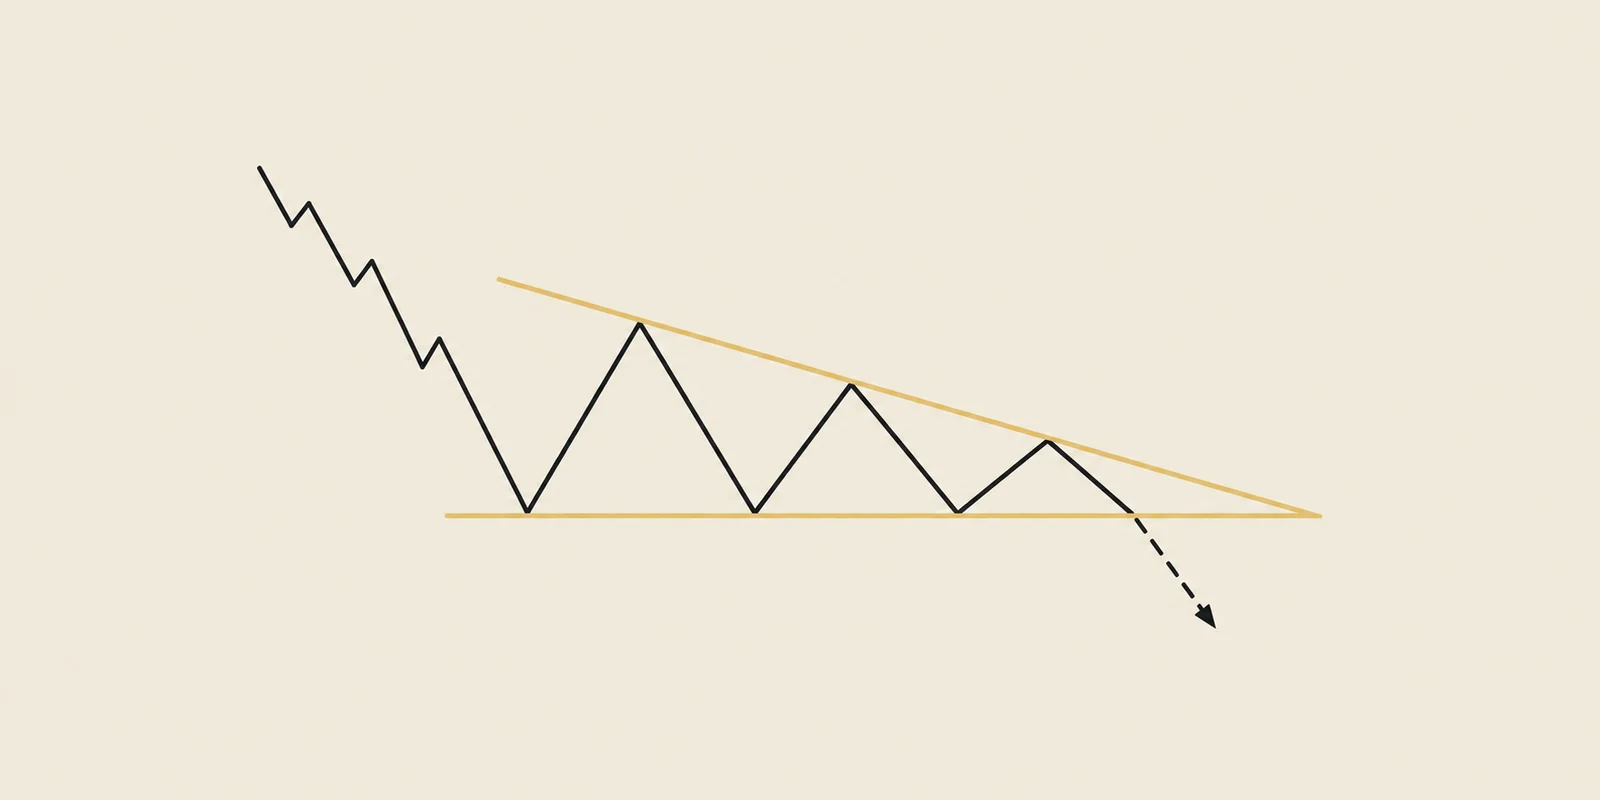
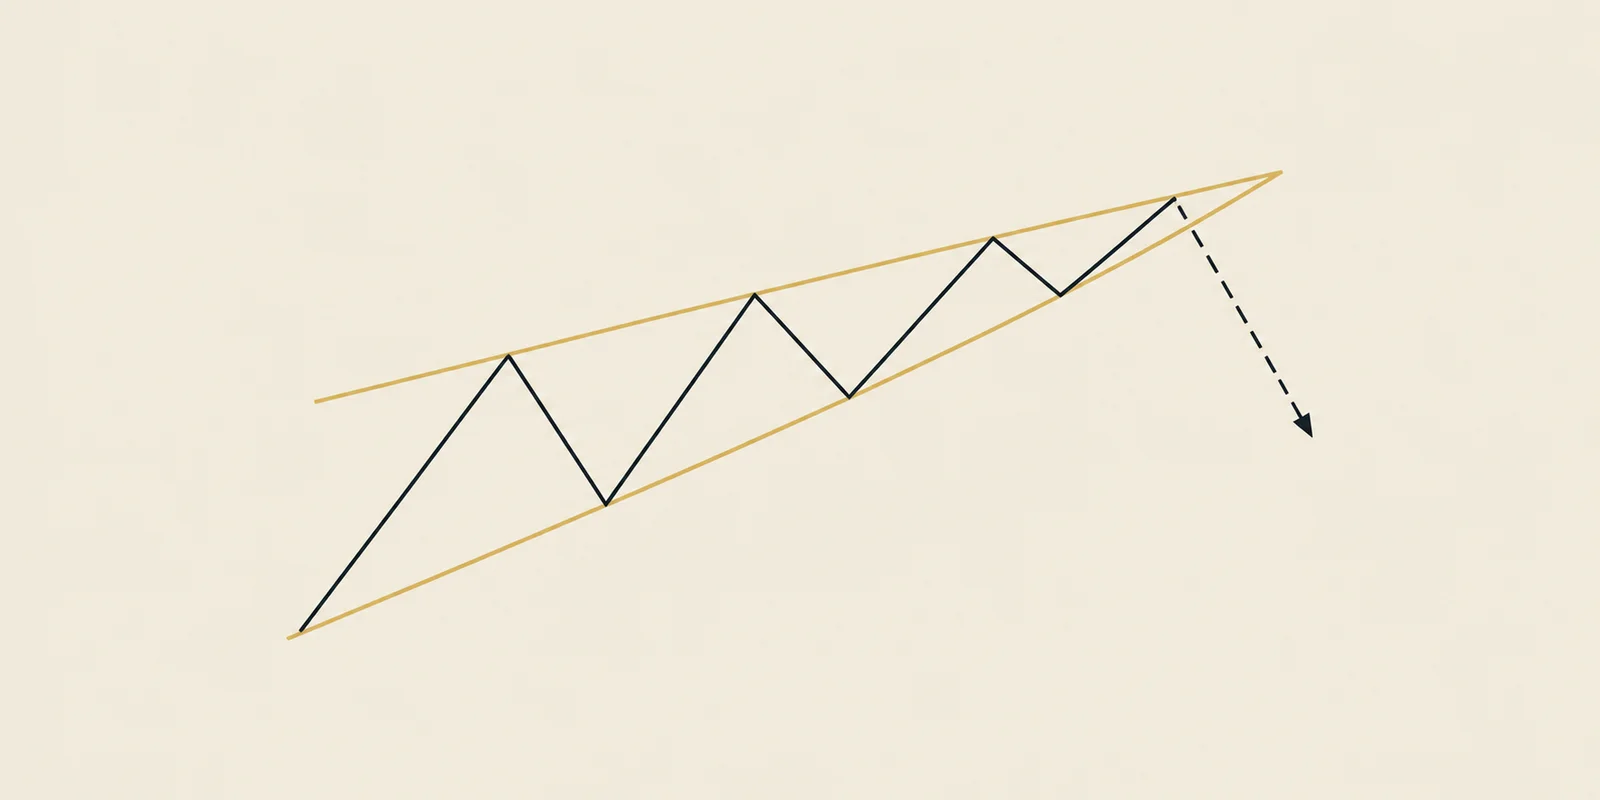
Illustrative shapes. Compare the move before the pause and the direction of the two boundaries.
The bearish label comes from the preceding decline. Traders watch the lower boundary for a continuation of that move.
A move above the upper boundary is possible too. For the illustrative stock that fell to $40, a recovery through the pause would undermine the case for entering a new downside trade.
A short trade sells borrowed shares and later buys them back. It gains from a decline and loses from a rise; borrow availability and costs also affect whether a real trade is possible.
The following steps describe TradingPal’s historical simulation. Choose each step on the diagram to see where the price level sits. The risk/reward guide explains how the distance from entry to the safety exit becomes the planned risk, or 1R.
The simulation places its entry trigger below the lower boundary. The pattern must have been established on an earlier daily candle. The first eligible candle to reach the trigger can fill the order. If price gaps past it overnight, the simulation uses the worse opening price.
The planned invalidation level sits above the last small bounce before the breakdown. The test closes the trade at the close of a later daily candle beyond that level. Price can overshoot it or gap past it, so the actual loss can exceed the planned 1R.
Measure the pattern’s height at its widest point and project that distance from the entry trigger in the direction of the trade. This is the measured-move target. The bearish rule closes at the projected downside target.
The table summarizes simulated trades using the entry and exit rules above. Check the direction, sample size and measurement period before comparing rows. These results update when a new historical run is published.
Read win rate together with the size of the wins and losses. A strategy can win half its trades and still gain or lose overall. Average R and profit factor help explain which happened; the track-record metrics guide covers the calculation.
The published pattern group includes shapes that passed later confirmation checks. That can affect which historical trades enter the sample, even when the simulated fill uses prices available at the time. The backtesting methodology explains this limitation and the portfolio assumptions.
The examples below are selected completed trades from the historical simulation. Compare the entry and exit in each, including the losing trades. Opening a symbol takes you to its current chart.
Selected for learning, with a mix of wins and losses where available. Closed in the 90 days ending Sep 11, 2026. This selection is not a win-rate sample.
No qualifying completed examples in this window. New examples appear as trades resolve.
Our screener re-draws the lines on 2,600+ symbols every night and flags each chart that currently fits the checklist above. The current matches appear below.
No fresh bearish pennant formed in the last 45 days (scan updated Sep 11, 2026) — patterns come and go with the market.
No current bearish pennant matched this guide in the latest scan. Setups come and go; the Morning Brief and Premium paths stay available.
The day's #1 ranked setup, in your inbox.
Every morning we hand you the highest-ranked breakout structure found in our scan across 2,600+ tickers — Free.
See the full offeringIt is named for the sharp decline before the pause. The downside trade starts only if price reaches its downward trigger.
The pennant has converging lines; the flag has roughly parallel lines. Both describe pauses after declines.
A bear pennant follows a decline and a bull pennant follows a rally. Both have a small, narrowing pause.
It usually describes an upward break from a pennant that formed after a decline. A trader already short needs to follow the position’s exit rule.
You can use the pattern to review the risk of shares you already own. A separate short trade involves borrowing and selling shares, then buying them back; a rise in price produces a loss.
A bullish pennant forms when a sharp rally pauses in a small, narrowing range.
A descending triangle combines repeated lows near one price with falling highs.
A rising wedge has two upward-sloping boundaries that draw closer together.
Educational content, not investment advice. Backtest statistics are historical results of a simulated strategy, refreshed nightly — they describe the past, not the next trade.